> For the complete documentation index, see [llms.txt](https://docs.replyco.com/llms.txt). Markdown versions of documentation pages are available by appending `.md` to page URLs; this page is available as [Markdown](https://docs.replyco.com/main-sections/adding-accounts/email-accounts/add-your-mailbox-via-forwarding.md).
# Add your Mailbox via Forwarding
{% hint style="warning" %}
[Access Rights](broken://pages/wxFu1OagFIfUoc18coEp) needed: **Main => Admin (View & Edit)**
{% endhint %}
Replyco can pull messages from your email account so all of your messages are in one centralized location. This is ideal for any role-based accounts (info@) that multiple users will need access to.
Reading your email accounts can be done in 1 of 2 ways:
1. **Forwarding.** You configure your current mailbox to forward messages to the Replyco email address we provide. Everything that is being sent to this Replyco-generated specific email address, will be displayed in Replyco.
2. [**SMTP**](/main-sections/adding-accounts/email-accounts/add-your-mailbox-via-custom-smtp-settings.md)**.** We will connect to your email server directly and use IMAP/POP protocols for receiving the emails and SMTP for sending them on your behalf when you reply via Replyco.
{% hint style="warning" %}
**WARNING:** If you are adding an email address that is already receiving notifications from an integration, you could be duplicating the number of tickets coming into the system.
{% endhint %}
Click on **+ Add Integration** at the top right of the app.
Select **Email** from the list of integration options.
Click on + Add Integration and select Email
## SETTING UP EMAIL FORWARDING
### Fill in the required fields and then press **Authorize** button.
**Enter your email address to integrate** - this should be the email address of the mailbox you are going to integrate into Replyco.
**Send Name as** - this is the name your recipients will see when you will send outcoming messages via Replyco. Here is an example of what it looks like in Gmail:
**Add a custom icon** - is an option that allows you to upload your own icon instead of a standard one:
Custom icons for Email integration
### Set Up a Forwarding Rule
Press the **Copy Email Address** button to get a specific Replyco-generated email address for your integration and then **go to your mailbox settings**.
Press the Copy Email Address button
In a separate window, log in to your **Email Host** to configure **Forwarding and POP/IMAP.**
When prompted, paste the address you **copied from Replyco.** It may look something like this:
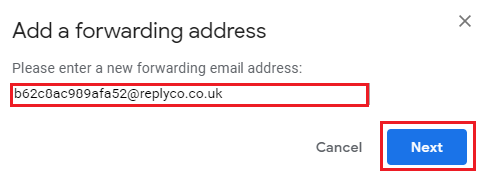
* Return back to the **Replyco page**, click **Authorize** to complete.
### All Done!
Once you passed all the steps, click the Finish button.
Click the Finish button.
### VIEW / EDIT
To see Integrations that have already been added, go to **Admin > Integrations.**

A list will show the Source, Synchronization Status, Account, Name, Date for Last Messages Synced, and Last Orders Synced.
* A :green\_circle:**green status** means that the Integration **IS** configured correctly.
* A :red\_circle:**red status** means the integration is **NOT** configured correctly.
####
#### Still have questions?
{% hint style="info" %}
**We're here to help!** If you have ANY questions, need help with setup, or just want to chat about customer support (really, we are always up for a good chat), please don't hesitate to reach out via:
**Chat:** [Click on the chat icon](http://replyco.com/#chat) (lower right of the App)

**Email:**
**Phone**: US:flag\_us: +1 407-588-2574 | UK:flag\_gb: +44 20 8064 0564
{% endhint %}