> For the complete documentation index, see [llms.txt](https://docs.replyco.com/llms.txt). Markdown versions of documentation pages are available by appending `.md` to page URLs; this page is available as [Markdown](https://docs.replyco.com/main-sections/administrative-processes/user-management.md).
# User Management
## User Inviting
**Follow this guide to create and invite users to your Replyco account. There is no limit to the number of users you can add!**
{% hint style="warning" %}
Access Rights needed: **Main => Admin (View & Edit)**
{% endhint %}
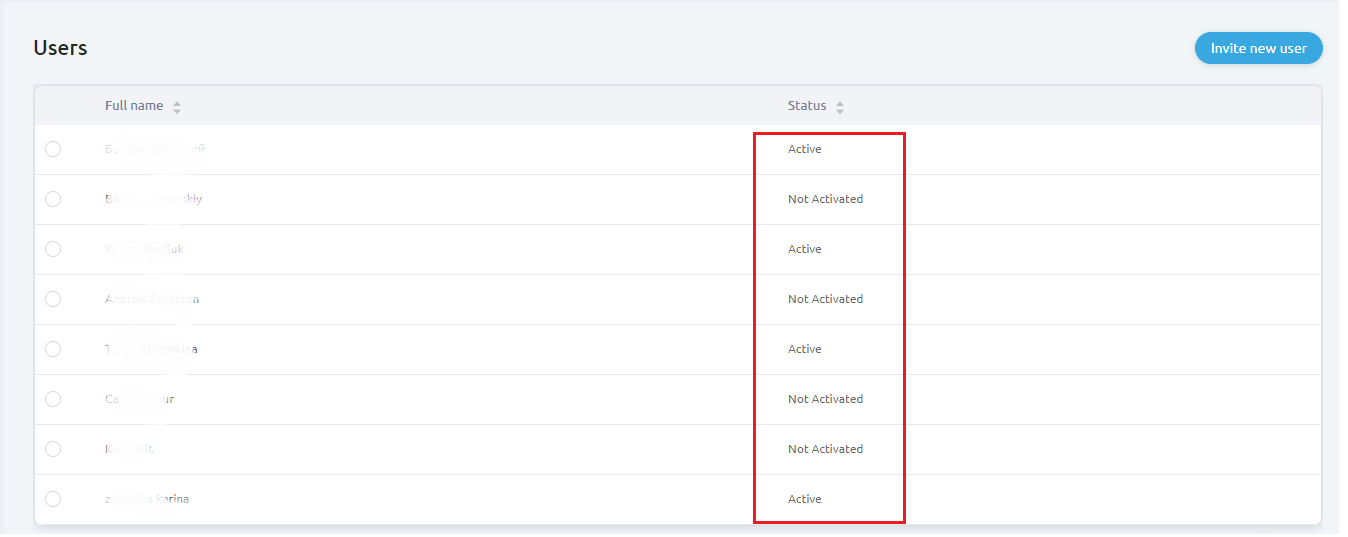
### Step 1: Go to Your Users List
From the left-hand side of the App screen, click on the **Admin** tab, and then select **Users** from the dropdown menu.

In the Users tab, you can see the user list and their statuses: **Activated** or **Not Activated.**
The "**Not Activated**" status means that the user was invited, but has not finished the registration process yet.
### Step 2: Invite a new User
On your top-right, you will find the Invite User button. Click on that button to start the process of inviting a new user.

Once clicked, a pop-up window will appear. Fill in all the necessary fields there, choose the basic settings preset for this user, and then click the **Send Invitation** button.
* The user's **Name** & **Last name** will be displayed in the App. They will be also used in Tags, e.g. #username# tag.
* The **Mobile** field is not necessary for filling.
* The **Email** field should contain the user's email address. An invitation letter will be sent there. This email will be also used for logging into Replyco.
* The [**Message Language**](/main-sections/user-account-settings/user-specific-settings/ticket-related-settings.md) setting shows the user's preferred messages language. **Please note that it is NOT the language of the App.**
* The **User Role** setting defines the preset of Access Rights this user will have.
* The **Default Message View** setting defines the way that ticket messages will be displayed to this user.

After sending the invitation letter, you will receive a pop-up notification that a new user was successfully created.

### Step 3: User Account Activation
In order to activate a Replyco account, a user must check his login mailbox and find an invitation email from Replyco. The activation link will be inside that letter.
{% hint style="info" %}
Sometimes Replyco invitation email might appear in a Spam/Junk folder. Ask your user to check them as well.
{% endhint %}
{% hint style="warning" %}
**Please ensure the user opens an activation link using the Google Chrome browser. We cannot guarantee a stable registration/activation process for other browsers.**
{% endhint %}
## User Editing
**As a Replyco admin, you can edit basic user information and some other settings without logging into the user's account.**
{% hint style="warning" %}
Access Rights needed: **Main => Admin (View & Edit)**
{% endhint %}
### Step 1: Go to Your Users List
From the left-hand side of the App screen, click on the **Admin** tab, and then select **Users** from the dropdown menu.

In the Users tab, you can see the user list**. Click** on the user you would like to Edit**.**
An **Information** tab will be opened.
### Step 2: Edit User Information

**Here are the fields that can be modified:**
* The user's **Name** & **Last name** will be displayed in the App. They will be also used in **Tags**, e.g. #username# tag.
* The **Mobile** number field.
* The **Email** field. This email will be also used for logging into Replyco.
* The [**Message Language**](/main-sections/user-account-settings/user-specific-settings/ticket-related-settings.md) setting shows the user's preferred message language when using the Translate feature. **Please note that it is NOT the language of the App.**
* The **User Role** setting defines the preset of **Access Rights** this user will have.
* The **Default Message View** setting defines the way that ticket messages will be displayed to this user.
Once the changes were made, **don't forget** to click the **Save** button.
## User Roles
**Assign specific roles (User, Moderator, Admin) to individual users.**
{% hint style="warning" %}
Access Rights needed: **Main => Admin (View & Edit)**
{% endhint %}
Simply put, User Roles are predefined sets of Access Rights, designed to make setting up user accounts easier.
### Step 1: **Choose a User**
From the left-hand side of the App screen, click on the **Admin** tab, and then select **Users** from the dropdown menu.

In the Users tab, you can see the user list**. Click** on the user you would like to Edit**.**
An **Information** tab will be opened.
### Step 2: **Choose the Role**
From the **User Role** drop-down, select one of the following roles:
**User**
* Full access to [Ticket Folders](/main-sections/working-with-modules/tickets/ticket-lists.md)
* A default set of [Labels](/main-sections/organizing-and-automatization/tickets/organizing-tools.md)
* [The Global Search Function](/main-sections/working-with-modules/tickets/ticket-creation-and-the-global-search-function.md#the-global-search-function)
* Tools access is limited to [Customers, Orders, and Products](/main-sections/customers-orders-and-products.md)
* Dashboard: Overview section only
* All Smart Filters
**Moderator:**
* Everything the User has, plus:
* Access to [Cases](/main-sections/working-with-modules/cases.md), [Feedback](/main-sections/working-with-modules/feedback.md), and [Instant Messages](/main-sections/working-with-modules/instant-messages.md) modules
* All [Organizing & Automatization](/main-sections/organizing-and-automatization.md) tools
* Dashboard: [All sections](/main-sections/dashboards-and-reporting/dashboard-system.md)
**Admin:**
* Full access to everything, including:
* [Admin](/main-sections/administrative-processes.md) module
* [Billing](/main-sections/administrative-processes/billing-details.md) module

{% hint style="info" %}
Don't forget to click the **Save** button.
{% endhint %}
{% hint style="info" %}
If you modify the user's Access Rights after choosing any Role, the Role name will be changed to **Custom**.
{% endhint %}
## Access Rights Management
**Replyco offers you a flexible tool that enables you to tweak each user's access rights thoroughly.**
{% hint style="warning" %}
Access Rights needed: **Main => Admin (View & Edit)**
{% endhint %}
To open the Access Rights tab, please visit **Admin => Users => \[choose a user you need] => Access Rights**.
Visit Admin => Users => [choose a user you need] => Access Rights.
The Access Rights tab contains many **sections** with **elements & features** you can interact with.
Almost every element/feature has the following possible options:
**View**: this option allows a user to view the element/feature without the ability to change it.\
**Edit**: this option allows a user to view the element/feature & modify its settings.
View & Edit options for Access Rights elements.
### Sections Description
#### Main
| Admin | An ability to view Integrations added, Company Settings & Users Settings | An ability to make changes related to these tabs |
| ---------------- | ------------------------------------------------------------------------ | ------------------------------------------------ |
| Billing | An ability to view the Billing page (Invoices, Charge history, Cards) | An ability to make changes related to this tab |
| Cases | An access to the eBay Cases module | An ability to process Cases |
| Feedback | An access to the Feedback module | An ability to interact with Feedbacks |
| Instant Messages | An access to the Instant Messages module | An ability to interact with Chat Conversations |
| Global Search | An access to the Global Search feature | An access to the Global Search feature |
| Calls | An access to the Calls module | An ability to interact with Calls |
#### Tools
| Customers | An ability to view the Customers tab & Customer Cards | An ability to edit Customer Cards |
| --------------------- | ---------------------------------------------------------------------------------- | ---------------------------------------------- |
| Products | An ability to view the Products tab & Product Cards | An ability to interact with Product Cards |
| Orders | An ability to view the Orders tab & Order Cards | An ability to interact with Order Cards |
| Automation | An ability to view existing Rules, Templates, Auto-response Rules & Feedback Rules | An ability to edit them |
| Labels | An ability to view all existing Labels | An ability to edit them |
| Shipping Labels | An ability to view all existing Shipping Labels | An ability to add new and delete existing ones |
| Custom Fields | An ability to view all existing Custom Fields | An ability to edit them |
| Widgets | An ability to view all existing LiveChats | An ability to edit them |
| Smart Filters | An ability to view all existing Smart Filters | An ability to edit them |
| Fallbacks | An ability to view all existing Fallbacks | An ability to edit them |
| Custom Shipping Links | An ability to view all existing Custom Shipping Links | An ability to edit them |
#### Labels
This section allows you to enable/disable **a certain label** for a certain user. Disabled labels are not visible to a user.
#### Tickets
This section allows you to enable/disable **a certain ticket folder** for a certain user. Disabled folders are not visible to a user. If everything is disabled, a user will have only the My Tickets folder with tickets assigned to this user.
#### Dashboard
This section allows you to enable/disable **a certain Dashboard tab** for a certain user. Disabled tabs are not visible to a user.
#### Smart Filters
This section allows you to enable/disable **a certain Smart Filter** for a certain user. Disabled Smart Filters are not visible to a user.
#### Widgets
This section allows you to enable/disable **a certain LiveChat Widget** for a certain user. Disabled LiveChat Widgets are not visible to a user.
#### Ticket Accounts
This section allows you to enable/disable **certain Ticket Accounts** (Mailbox, eBay/Amazon or any other store you have integrated into Replyco already) for a certain user. Disabled Ticket Accounts are not visible to a user.
#### Instant Messages Accounts
This section allows you to enable/disable **a certain Instant Messages Integration** (Facebook, Instagram, Telegram, etc.) for a certain user. Disabled Instant Messages Integrations are not visible to a user.
Once everything is set up, click **Save**.
#### Still have questions?
{% hint style="info" %}
**We're here to help!** If you have ANY questions, need help with setup, or just want to chat about customer support (really, we are always up for a good chat), please don't hesitate to reach out via:
**Chat:** [Click on the chat icon](http://replyco.com/#chat) (lower right of the App)

**Email:**
**Phone**: US:flag\_us: +1 407-588-2574 | UK:flag\_gb: +44 20 8064 0564
{% endhint %}
---
# Agent Instructions
This documentation is published with GitBook. GitBook is the documentation platform designed so that both humans and AI agents can read, navigate, and reason over technical content effectively. Learn more at gitbook.com.
## Querying This Documentation
If you need additional information that is not directly available in this page, you can query the documentation dynamically by asking a question.
Perform an HTTP GET request on the current page URL with the `ask` query parameter, and the optional `goal` query parameter:
```
GET https://docs.replyco.com/main-sections/administrative-processes/user-management.md?ask=&goal=
```
`ask` is the immediate question: it should be specific, self-contained, and written in natural language.
`goal` is optional and describes the broader end goal you are ultimately trying to accomplish on behalf of the user. GitBook uses it to tailor the answer towards what is most useful for that goal.
The response will contain a direct answer to the question and relevant excerpts and sources from the documentation.
Use this mechanism when the answer is not explicitly present in the current page, you need clarification or additional context, or you want to retrieve related documentation sections.