> For the complete documentation index, see [llms.txt](https://docs.replyco.com/llms.txt). Markdown versions of documentation pages are available by appending `.md` to page URLs; this page is available as [Markdown](https://docs.replyco.com/main-sections/adding-accounts/social-media/facebook-messenger.md).
# Facebook Messenger
{% hint style="warning" %}
**Access Rights Needed**:
Main => Admin (View & Edit)
Main => Instant Messages
{% endhint %}
{% hint style="warning" %}
**Restricting User Access to Instant Messages**
\
You can control access to specific Instant Messages integrations for each user by visiting Instant Messages Accounts and choosing Relevant Accounts.
{% endhint %}
Replyco seamlessly integrates with Facebook Messenger, enabling efficient customer communication directly from your helpdesk.
### **Step 0: Add Yourself as a Facebook Business Page Manager**
{% embed url="" %}
1. Select the Facebook Business Page you wish to integrate with Replyco.
2. Navigate to **Settings and Privacy > Settings**.
3. Locate the **Page Access** section and add yourself to the **People with Facebook Access** list with full access rights.
**Once Step 0 is finished, you will be able to integrate your Facebook Messenger into Replyco.**
***
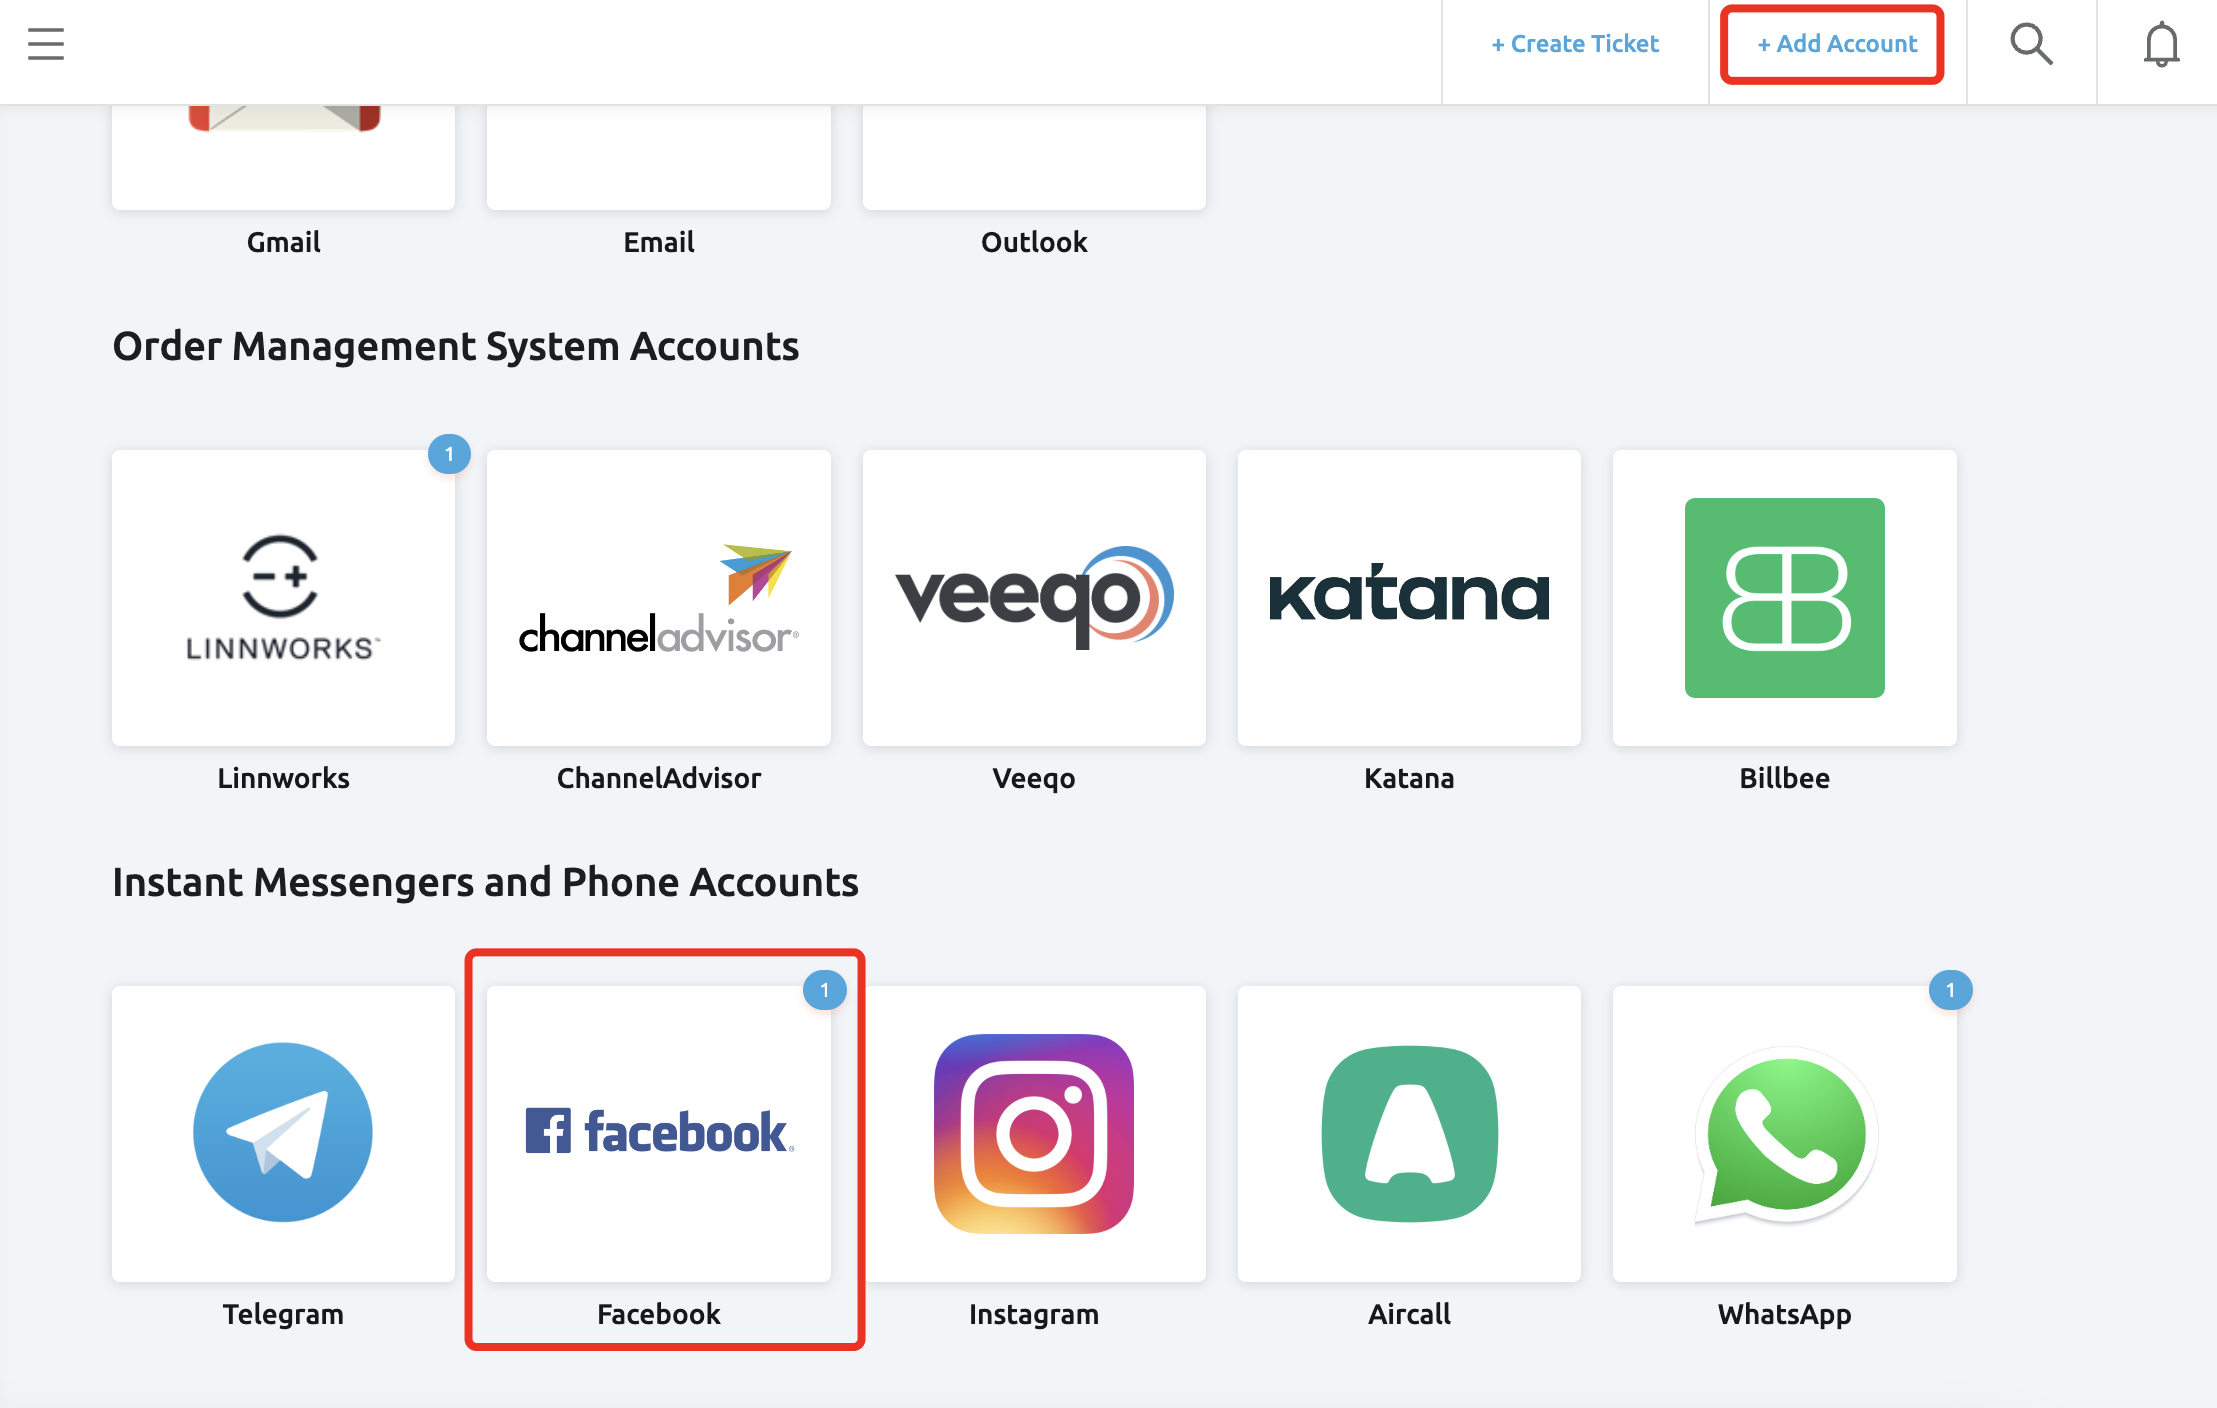
### **Step 1: Add A New Integration**
{% embed url="" %}
\
Click the **+ Add Account** button at the top right, then select **Facebook**.
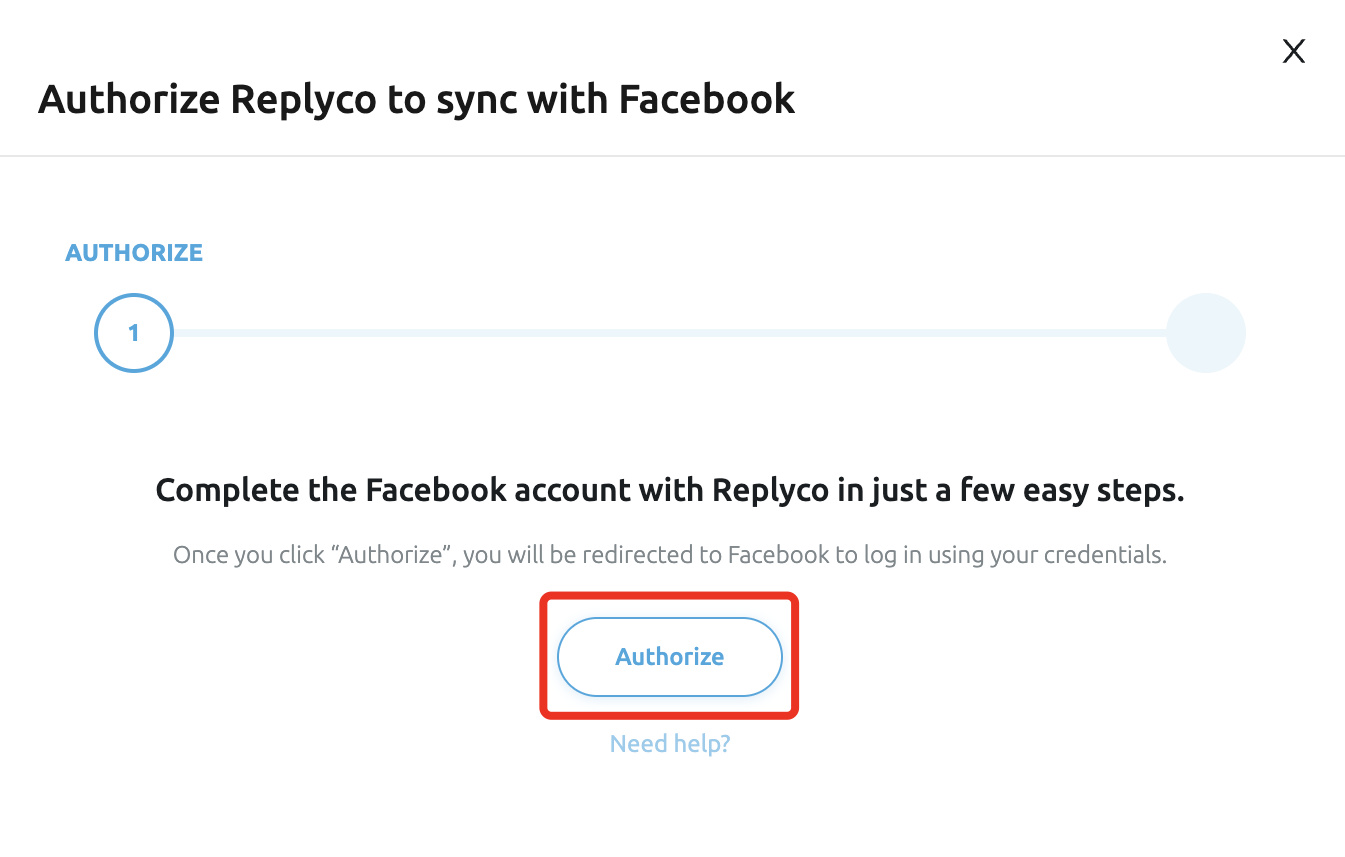
### **Step 2: Click “Authorize”**
\
Click on **Authorize** to proceed with the Facebook integration.
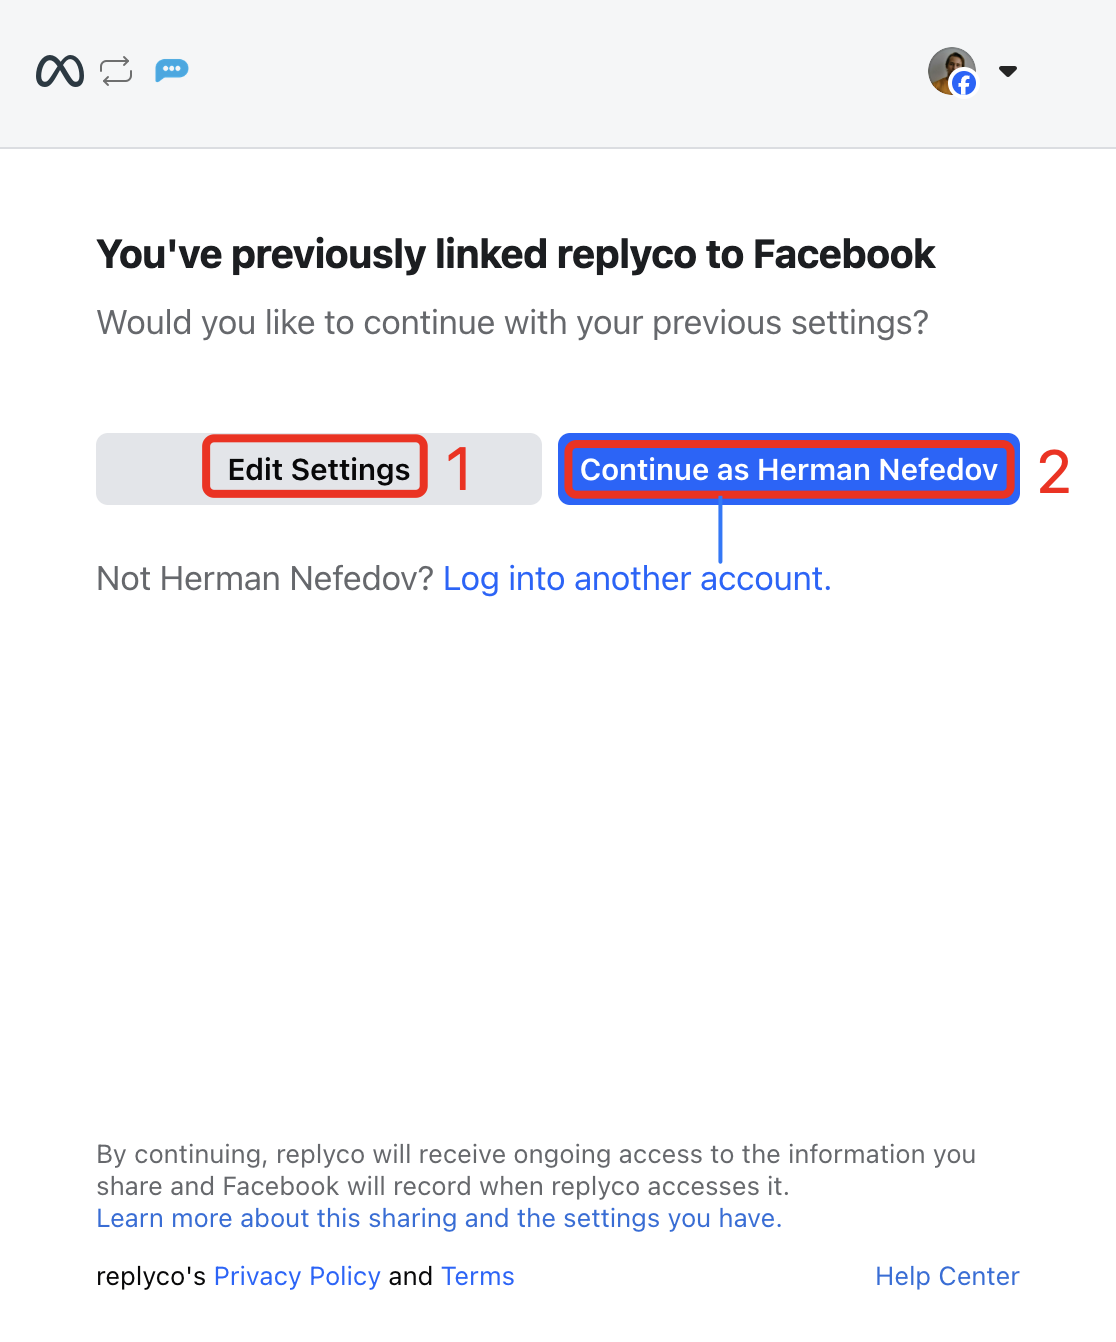
### **Step 3: Confirm Your Account & Select Page**
Click **Edit Settings (1)** and choose a Page you wish to integrate with Replyco to receive and respond to customer messages. Then, click **Next**.
> **Please be aware that you can only select one page for integration at a time. To integrate additional pages, you will need to complete the integration process individually for each one.**
Verify you’re signed into the correct Facebook account for integration, and select **Continue as \[name] (2)**. Alternatively, choose **Log into another account** if needed.
### **Step 4: Grant Permission to Replyco**
\
To ensure smooth integration, leave both permission toggles set to “Yes,” then click **Done**.
**All Done!**\
A confirmation message will notify you that Replyco has been successfully linked to your Facebook account. Click **OK** to return to the Replyco home screen.
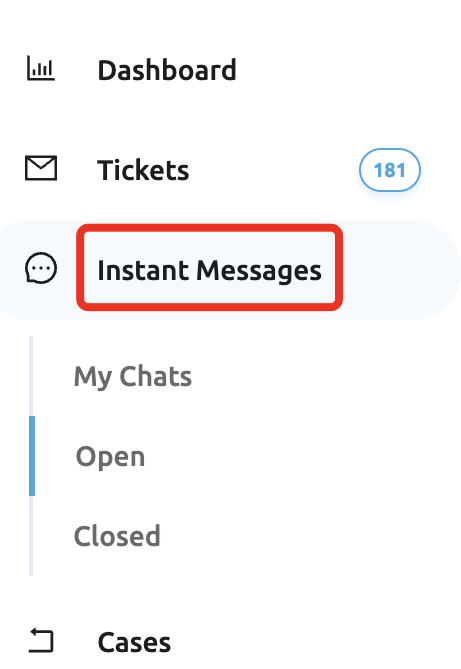
Now, you’ll see the **Instant Messages** tab in Replyco’s menu, where you can view and respond to all incoming Facebook Messenger inquiries.
**VIEW / EDIT**
To view integrations that have already been added, go to **Admin > Accounts**.
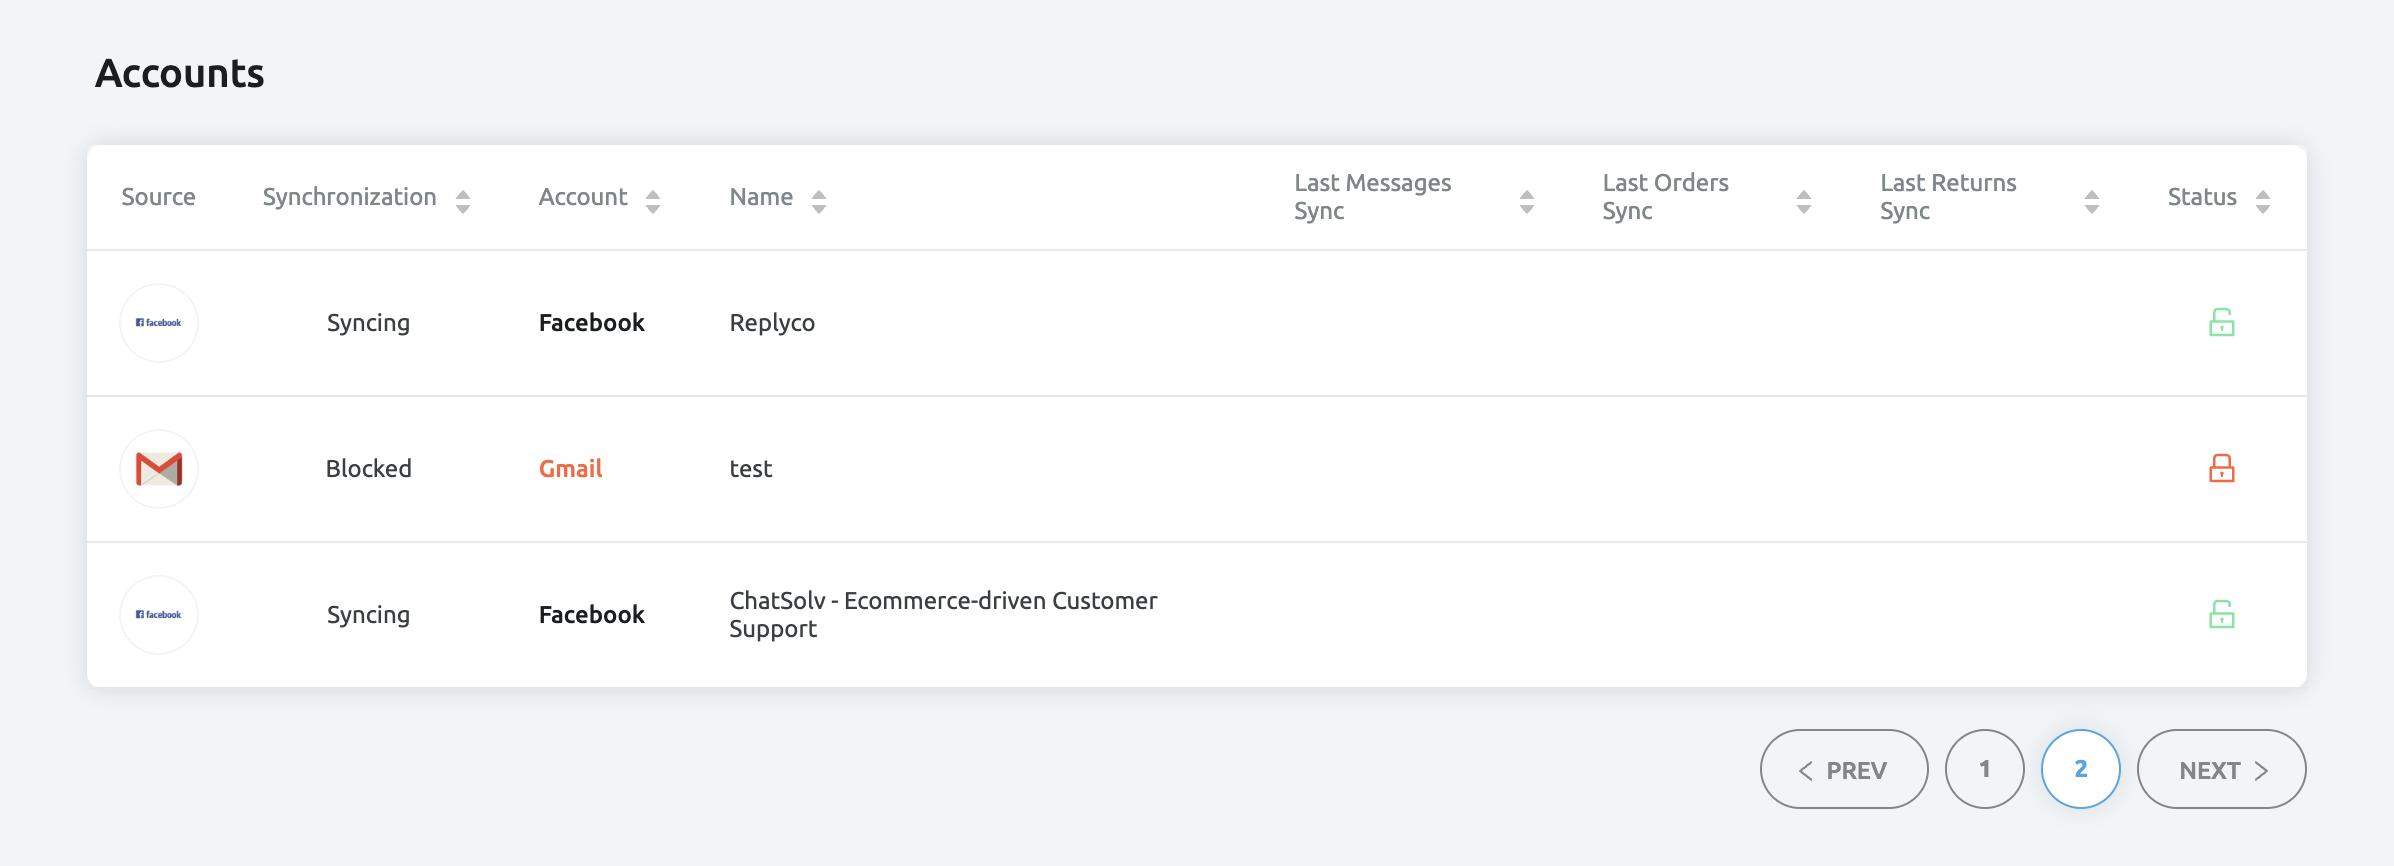
A list will display the Source, Synchronization Status, Account, Name, Date for Last Messages Synced, and Last Orders Synced.
* A 🟢 green status means that the integration is configured correctly.
* A 🔴 red status indicates that the integration is not configured correctly.

 ### **Step 2: Click “Authorize”**
\
Click on **Authorize** to proceed with the Facebook integration.
### **Step 2: Click “Authorize”**
\
Click on **Authorize** to proceed with the Facebook integration.
 ### **Step 3: Confirm Your Account & Select Page**
Click **Edit Settings (1)** and choose a Page you wish to integrate with Replyco to receive and respond to customer messages. Then, click **Next**.
> **Please be aware that you can only select one page for integration at a time. To integrate additional pages, you will need to complete the integration process individually for each one.**
Verify you’re signed into the correct Facebook account for integration, and select **Continue as \[name] (2)**. Alternatively, choose **Log into another account** if needed.
### **Step 3: Confirm Your Account & Select Page**
Click **Edit Settings (1)** and choose a Page you wish to integrate with Replyco to receive and respond to customer messages. Then, click **Next**.
> **Please be aware that you can only select one page for integration at a time. To integrate additional pages, you will need to complete the integration process individually for each one.**
Verify you’re signed into the correct Facebook account for integration, and select **Continue as \[name] (2)**. Alternatively, choose **Log into another account** if needed.
 ### **Step 4: Grant Permission to Replyco**
\
To ensure smooth integration, leave both permission toggles set to “Yes,” then click **Done**.
**All Done!**\
A confirmation message will notify you that Replyco has been successfully linked to your Facebook account. Click **OK** to return to the Replyco home screen.
Now, you’ll see the **Instant Messages** tab in Replyco’s menu, where you can view and respond to all incoming Facebook Messenger inquiries.
### **Step 4: Grant Permission to Replyco**
\
To ensure smooth integration, leave both permission toggles set to “Yes,” then click **Done**.
**All Done!**\
A confirmation message will notify you that Replyco has been successfully linked to your Facebook account. Click **OK** to return to the Replyco home screen.
Now, you’ll see the **Instant Messages** tab in Replyco’s menu, where you can view and respond to all incoming Facebook Messenger inquiries.
 **VIEW / EDIT**
To view integrations that have already been added, go to **Admin > Accounts**.
**VIEW / EDIT**
To view integrations that have already been added, go to **Admin > Accounts**.
 A list will display the Source, Synchronization Status, Account, Name, Date for Last Messages Synced, and Last Orders Synced.
 * A 🟢 green status means that the integration is configured correctly.
* A 🔴 red status indicates that the integration is not configured correctly.
* A 🟢 green status means that the integration is configured correctly.
* A 🔴 red status indicates that the integration is not configured correctly.